Configuring and clearing files
You can configure the following settings for audio or video files, and the session log file:
Note: You can configure media files only when they are open, and when they are neither being recorded nor played.
Configuring audio files
To configure the settings of an audio file:
In the File menu, click Open for Play, and select the audio file you want to configure.
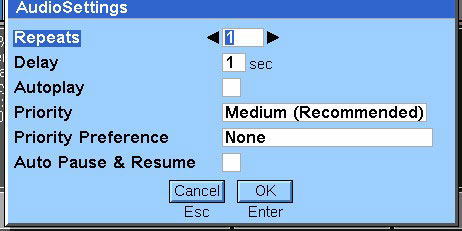
In the Settings menu, click Audio. The Audio Settings dialog box is displayed.
In the Repeats box, enter the number of times to repeat the audio clip.
In the Delay box, enter the interval between repeats in seconds.
Select the Autoplay check box to play the file automatically when you open it for play.
Select the Priority and Priority Preference.
Select the Auto Pause&Resume check box to enable this functionality.
Click OK to save the audio settings.
Configuring video files
Note: The ability to configure the video settings is not yet supported.
To configure the settings of a video file:
In the File menu, click Open for Play, and select the video file you want to configure.
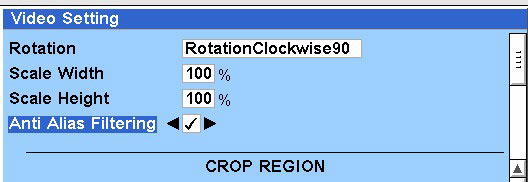
In the Settings menu, click Video. The Video Setting dialog box is displayed.
Select the degree of Rotation.
Enter percentages for the Scale Width and Scale Height.
Select the Anti Alias Filtering check box to enable anti-alias filtering.
Enter the coordinates in the top, bottom, left and right boxes to define the boundaries of the crop region.
Select the Viewfinder check box to enable it.
Enter values for the Camera Index and Camera Priority.
Click OK to save the video settings.
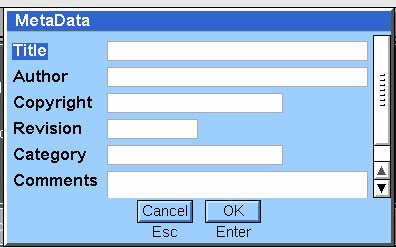
Configuring file metadata
You can enter the metadata for any media file that is open for record. You can view but cannot modify the metadata of a file that is open for play.
To enter or modify file metadata:
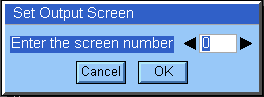
Setting the video output screen
You can set the video output rendering to any specific screen number.
To set the output screen:
Enabling auto pause and resume for video
You can enable auto pause and resume for video by registering for resource notification. Registering for resource notification means that the audio playback for a video can be paused and resumed efficiently if access to the resource is lost and subsequently regained.
To enable auto pause and resume:
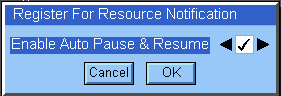
In the Settings menu, select Register For Notification. The Register For Resource Notification dialog box is displayed.
Select the Enable Auto Pause & Resume check box to enable this functionality.
Click OK to save the auto pause and resume setting.
If you currently have a media file open for record, an information message is displayed to inform you that the setting has been applied. Otherwise, the setting is saved and applied when you next open a media file for record.
To disable auto pause and resume, repeat the above steps but clear the Enable Auto Pause & Resume check box.
Clearing the log file
All events during a session are recorded in a log file.
To clear the log for the current session, in the Settings menu, click ClearLog.
Note: This feature is currently not available.
Copyright ©2010 Nokia Corporation and/or its subsidiary(-ies).
All rights
reserved. Unless otherwise stated, these materials are provided under the terms of the Eclipse Public License
v1.0.